There are two options to include a photo within the Matrix Email Signature:
- Host the photo on your own personal website, or another website where you have access to add photos. You can then use that image's URL to paste into the image section of the Matrix email signature.
- Use a photo that Matrix is hosting. Matrix can use photos that you have uploaded either to the CMA Cover photo or in your Header & Footer image.
To add/change a photo on your Matrix email signature, go to My Matrix> Settings> Email Signature, place the cursor where you would like to insert the image and then click on the Image icon on the toolbar:

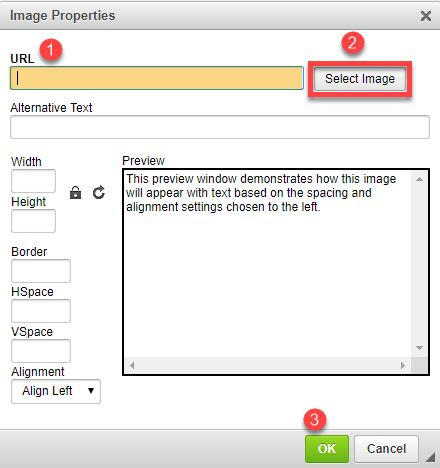
You will then see this window:

1. If you are hosting the photo yourself (on your personal website), copy and paste the URL of the image into the URL field.
2. If you are using an image that Matrix is hosting (either in the CMA Cover page or your Header & Footer)*, click Select Image and choose the desired photo.
3. Click OK when you have the image selected.
Remember to click Save to lock in your changes.
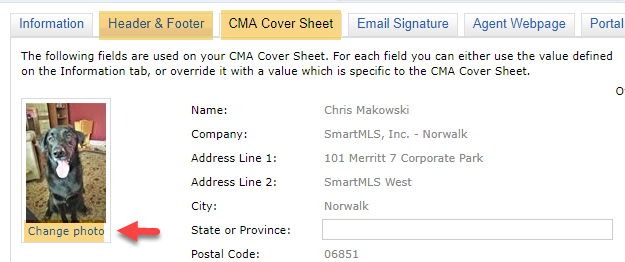
* You can add/change your Matrix-hosted agent images by going to My Matrix> My Information and using either the Header & Footer or CMA Cover Sheet tabs:

Note: Agent photos added through the Add/Edit tab are not available to use in the Email Signature. Those photos are only used for exporting and for RETS/IDX purposes.
Comments
Please sign in to leave a comment.